TV Sound Leveling: The Complete Guide to Consistent Volume on Any Television
Introduction
Volume jumps ruin a quiet evening and make dialogue hard to follow. You switch from a movie to a commercial, and the room suddenly shakes. Then whispers vanish in the next scene. You do not have to live with this. TV sound leveling can stabilize volume across channels, apps, and inputs.
This guide shows how sound leveling works, what to enable on your TV, and how to fix stubborn swings from streaming boxes and cable. You will learn the difference between leveling, Night Mode, and dialogue enhancement. You will also see the common pitfalls that block leveling and how to test your setup.
We will start with simple definitions. Then we will move through brand menus, source devices, and soundbars. Along the way, you will get step-by-step checklists you can use right now. By the end, you can watch anything without riding the remote.
What Is TV Sound Leveling? AVL, ALC, DRC, and Loudness Normalization Explained
You just heard why predictable volume matters. Now let’s define the tools that do the job and how each one behaves in your system.
Automatic Volume Leveling (AVL) and Automatic Level Control (ALC)
AVL and ALC aim to keep overall loudness consistent from scene to scene and input to input. They monitor average volume and gently adjust gain so quiet parts rise and loud parts fall. Brands use different names, but the goal stays the same: stable listening without constant remote clicks. Use it for everyday viewing or mixed content sessions.
Dynamic Range Compression and ‘Reduce Loud Sounds
Dynamic Range Compression (DRC) reduces the difference between soft and loud sounds within a single soundtrack. Many TVs and streamers label this feature as ‘Reduce Loud Sounds’ or ‘Night Mode.’ It softens explosions and boosts whispers. Use it when you want less punch and more clarity at lower volumes, especially at night.
Loudness Units (LUFS) and normalization in streaming
Streaming services target a loudness standard measured in LUFS. Not all apps hit the same target, and ads often arrive hotter. Leveling and DRC compensate for these differences at playback. They cannot fix a bad mix, but they narrow gaps so you hear more consistent volume across shows, movies, and live channels.
Why TV Volume Fluctuates Between Content, Ads, Apps, and Inputs
With the tools defined, it helps to know where volume swings come from. That answer points you to the right fix and the right device to adjust. Once you see the causes, you can match them to leveling, DRC, or dialogue tools in the next section.
Mixed mastering practices across services
Different studios and platforms mix audio to different loudness targets and dynamic ranges. A news clip may sit near the target, while a blockbuster keeps wide dynamics for impact. When you jump between them, you hear swings. Leveling smooths those transitions, so you do not need to change volume between apps and shows.
Ad insertion and perceived loudness
Ads may follow legal limits yet still sound louder. They pack sound energy into midrange frequencies and compress hard to cut through. That design triggers perceived loudness spikes. Leveling and DRC help tame these peaks without silencing speech, and dialogue tools ensure voices remain clear over music and effects.
Device output formats and mismatched levels
Your TV might receive PCM from one app and Dolby Digital from another. One input may be set to bitstream while another forces PCM. These choices change how much control your TV has. If the TV passes a bitstream untouched, leveling may not apply. Matching formats reduces surprises and sets you up for the brand and source fixes that follow.
Leveling vs Night Mode vs Dialogue Enhancement: Which One Should You Use?
Identifying the cause makes it easier to pick the right setting. These three features overlap but solve different problems. In practice, you will often use one as a default and keep the others ready for specific needs.
When to choose leveling for everyday TV
Turn on Automatic Volume Leveling for daily viewing. It targets overall consistency between sources and scenes. Use it when you channel surf, switch apps often, or want fewer remote clicks. Keep it as your default for news, sitcoms, and varied YouTube content.
Night Mode for quiet hours
When you need to keep things quiet, enable Night Mode or ‘Reduce Loud Sounds.’ It compresses peaks and prevents sudden blasts from waking anyone. Combine Night Mode with lower master volume and a small bump to dialogue enhancement if voices still hide under effects. You can save this as a preset to swap in after dark.
Dialogue enhancement for intelligibility
If you hear the soundtrack fine but miss words, enable Dialogue or Speech Clarity. This tool boosts voice frequencies and can lift the center channel in surround mixes. Avoid setting it too high or sibilants may sound harsh. Keep leveling on if you still switch sources often. If your system allows per-input tweaks, apply dialogue tools to the inputs that need them most.
Brand-Specific Settings to Enable on Popular TVs
Now that you know what to pick, you need to find the menu names. Each brand uses different labels, and combinations matter. The settings below connect directly to the features you just chose, so you can turn them on quickly.
Samsung: Auto Volume, Intelligent Mode, AI Sound
On Samsung, enable Auto Volume for consistent loudness. Intelligent Mode can adapt to your room; test it against a fixed profile like Standard or Adaptive Sound. AI Sound may improve clarity, but avoid stacking too many effects if voices sound processed. If you use external speakers via eARC, confirm whether the TV or your soundbar should handle leveling.
LG: Auto Volume, AI Sound Pro, Clear Voice, Dolby options
On LG, turn on Auto Volume and try AI Sound Pro for light processing. Clear Voice lifts speech; start at low levels to avoid hiss. In Dolby settings, test Dynamic Range from Auto to Reduced if nights demand softer peaks. Keep output format consistent across inputs so your results do not change when you switch to a console or cable box.
Sony (Google TV): Auto Volume, Dynamic Range, Acoustic calibration
On Sony, enable Auto Volume in Sound settings. Set Dolby Dynamic Range to Auto for general use or Compress for late nights. Run Acoustic Auto Calibration so the TV understands your room. Avoid stacking heavy enhancements if Atmos content feels flat, and check per-input audio format so leveling stays active.
TCL | Roku TV: Volume Leveling, Night Mode, Speech Clarity
TCL with Roku offers Volume Leveling and Night Mode under Volume Modes. Start with Leveling for daily use. Add Speech Clarity on low if dialogue trails effects. Use per-input settings so OTA channels and HDMI devices hold the same behavior. If an app resets volume modes after updates, revisit the Options menu and re-enable them.
Hisense and Vizio: Auto Volume, TruVolume, Dialogue Leveling
Hisense includes Auto Volume and AI sound presets; choose one consistent profile and adjust lightly. Vizio features TruVolume and Dialogue Leveling. Enable TruVolume for day-to-day viewing. Keep Dialogue Leveling modest to avoid artifacts on sibilants and high female voices. If you use an external device, confirm whether the TV or the device applies final processing.
Source-Side Solutions on Streamers and Cable/Satellite Boxes
Even the best TV settings cannot always reach every signal. Source devices often include their own leveling and DRC that work before the audio leaves the box. Tuning sources complements TV settings and gives you control when passthrough limits processing.
Roku: Volume Leveling vs Night Mode
Open Options during playback and choose Volume Mode. Pick Leveling for stable loudness across channels and apps. Use Night for late viewing. Roku applies this per device and sometimes per app, so check settings after updates. If your TV or bar also levels, choose one device to lead and set the others to neutral.
Fire TV: Volume Leveler and Dialogue Enhancer
On Fire TV, enable Volume Leveler and Dialogue Enhancer under Audio. Leveler targets consistency. Dialogue Enhancer lifts voices. Confirm app audio settings do not override system choices, and avoid double-processing if your TV already levels strongly. If ads still spike, toggle passthrough off so Fire TV can apply its processing.
Apple TV: Reduce Loud Sounds and audio format settings
On Apple TV, toggle Reduce Loud Sounds for DRC. In Audio Format, decide between Auto, Dolby Digital, or Stereo. If your TV cannot level bitstreams, set PCM stereo or multichannel PCM so the TV’s leveling can engage when needed. For surround nights, switch back to bitstream and let your AVR or soundbar handle dynamics.
Google TV/Chromecast: dynamic range and passthrough options
In Chromecast with Google TV, disable passthrough if you need the TV to process audio. Adjust dynamic range compression in app settings where available. Confirm CEC volume control does not fight with your TV’s processing. If volume still swings, set the output to PCM and let the TV or bar apply leveling.
Cable/Satellite: box-side audio settings to stabilize volume
On boxes like Xfinity or DirecTV, look for ‘Audio Range,’ ‘Compression,’ or ‘Auto Volume’ options. If commercials spike, try ‘narrow’ or ‘compressed.’ Set output to PCM if your TV’s leveling cannot touch bitstreamed surround. Match levels across inputs by trimming the HDMI port on your TV or AVR.
Soundbars and AV Receivers with Built-In Leveling
You may send all audio to a soundbar or AVR. In that case, hardware often offers stronger, cleaner processing than a TV alone. Shifting control here can solve issues that TV menus cannot touch.
Dolby Volume, DTS options, and manufacturer features
Many bars and receivers offer Dolby Volume, DTS TruVolume, or brand modes like Night and Voice. These apply consistent gain and spectral shaping. If your TV passes audio over eARC, the bar’s processing usually has priority and better headroom. Use the bar’s app to save day and night presets.
When hardware processing beats TV or source settings
Soundbars and AVRs have more power and better algorithms. They can compress with fewer artifacts and maintain clarity at low volumes. If your TV struggles with Atmos or multichannel leveling, shift the job to the bar or AVR. Keep TV processing off to avoid conflicts.
Preventing double-processing across the chain
Do not stack leveling on TV, streamer, and bar all at once. Pick one device to lead. Start with the soundbar or AVR if available. Leave the others neutral unless specific apps still drift. If you detect pumping or dullness, back off one processor and retest.
Step-by-Step Setup Checklists for Living Rooms and Bedrooms
We have covered devices and modes. Now follow clear checklists to lock in your setup without guesswork. These steps connect the earlier guidance to practical changes you can make in minutes.
Basic path: TV speakers only
1) Set TV output to PCM if leveling fails on bitstream.
2) Enable Auto Volume or Volume Leveling.
3) Turn on Dialogue enhancement at the lowest effective level.
4) Test Night Mode for late hours; save to a separate profile if available.
5) Play a loud ad and a quiet scene to confirm stability.
Soundbar setup: ARC/eARC and presets
1) Use HDMI ARC/eARC between TV and bar.
2) Disable TV leveling first to avoid double-processing.
3) Enable the bar’s leveling or Night mode.
4) Add Voice or Dialogue on low.
5) If spikes persist, switch TV output from bitstream to PCM.
6) Save day and night presets in the bar’s app for one-button switching.
AVR/home theater: input trims and dynamic range controls
1) Run room correction and set speaker levels.
2) Set Dynamic Range to Auto for day, Reduced for night.
3) Use input trims to match source loudness.
4) Add Dialogue Lift or Center Level as needed.
5) Avoid heavy compression for reference movie nights.
6) Store profiles to remote buttons for quick changes.
Common Pitfalls: eARC Passthrough, Atmos, PCM vs Dolby Digital
Those checklists work well, but three traps cause most failures. Fixing them restores control and clarity. Once you avoid them, testing becomes quicker and results hold across all inputs.
Why leveling may not affect bitstreamed surround tracks
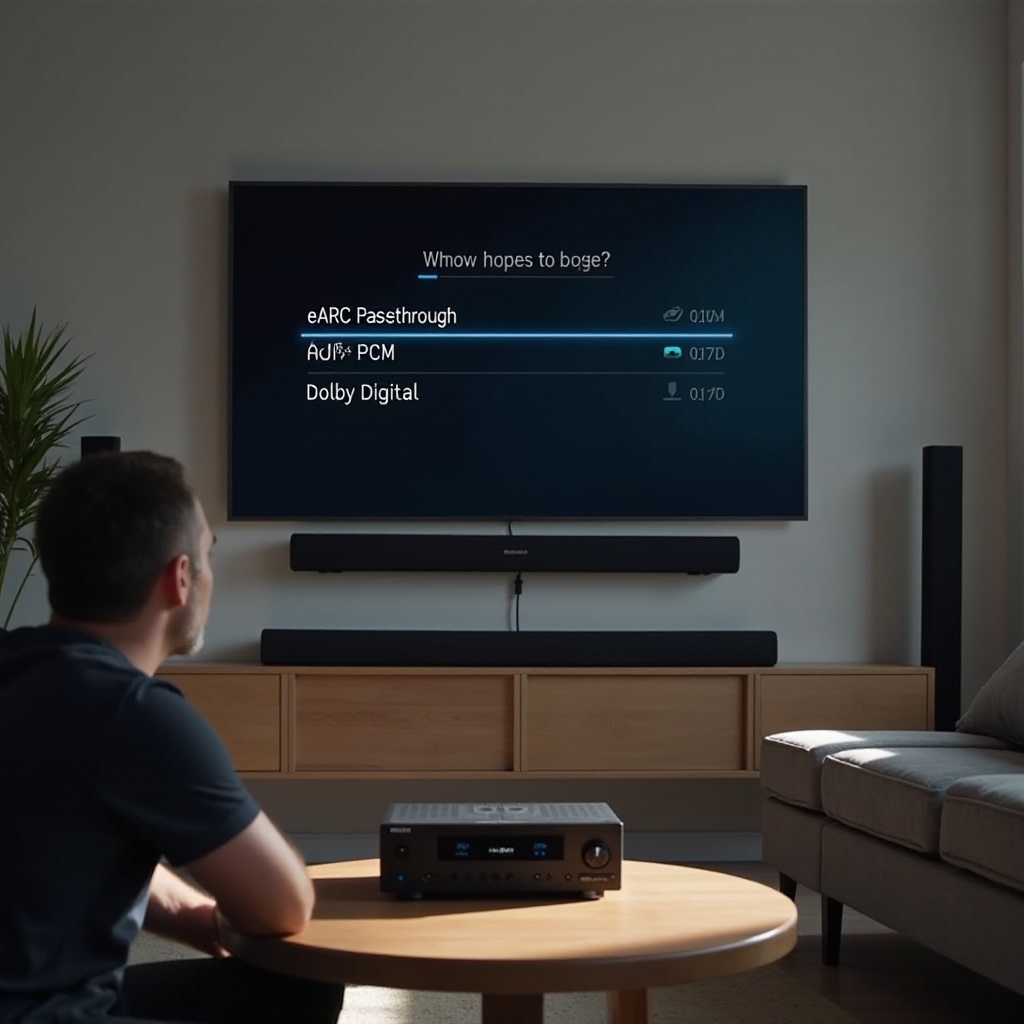
When a device sends Dolby Digital or Dolby Atmos as a bitstream, many TVs pass it untouched to preserve quality. If your TV levels only PCM, you hear swings again. Shift processing to your soundbar or AVR or set the source to PCM so the TV can work.
Using PCM when you need stronger leveling
PCM gives the TV access to the raw audio, so its leveling and DRC can work. Try PCM when loud ads sneak past bitstream. If you lose surround, return to bitstream on movie nights and let your bar or AVR handle leveling. Save both choices as profiles to switch fast.
App-by-app exceptions and input-specific settings
Some apps ignore system DRC or reset after updates. Inputs store separate audio profiles on many TVs. Check each HDMI port and app once. Copy working settings across, and lock profiles if your TV supports presets. Keep a quick note of which inputs use PCM versus bitstream.
How to Test and Fine-Tune Your Leveling Settings
After you apply fixes, test them. A short, repeatable routine helps you hear what changed and catch problems early. Careful testing also avoids overly compressed sound.
Reference clips and consistent test patterns
Use a loud commercial, a dialogue-heavy scene, and an action sequence. Play them at the same master volume. Switch modes and note how voices and peaks change. Favor the setting that needs the fewest remote taps and keeps dialogue clear.
Measuring perceived dialog clarity
Do not chase meter readings. Ask if you understand speech at low volume. If not, raise Dialogue enhancement slightly or reduce effects by one step. Avoid over-bright voices that fatigue your ears. If your bar has a center level, add 1 dB and test again.
Avoiding bias and over-compression
Listen for pumping, hiss, and flattened soundscapes. If music and ambience feel dead, back off compression. Keep one profile for day and another for night to avoid constant tweaking. Retest after firmware updates, as defaults can change.
Quick Fixes by Scenario: Ads, Sports, Movies, Gaming, OTA Broadcast
You can now target common situations with fast, reliable moves. These quick fixes build on the tools and pitfalls you just learned.
Taming loud commercials without killing dynamics
Enable Leveling on TV or source. If ads still spike, add light DRC. Consider PCM output so leveling grabs the stream. Avoid maximum compression for movies. If your box offers an ad volume setting, set it to compressed.
Clear play-by-play and crowd noise balance
Use Dialogue enhancement on low. Keep Leveling on. If crowd noise drowns voices, enable Stadium or Sports modes carefully; reduce if they boost bass too much. On an AVR, raise center channel by 1–2 dB.
Movie night without waking the house
Turn on Night Mode and keep Leveling active. Reduce subwoofer level slightly. If using an AVR, pick Reduced Dynamic Range and raise the center channel by 1–2 dB. Save this as a Night preset for quick access.
Low-latency choices for gaming
Disable heavy DRC to avoid lag. Use light Dialogue enhancement in story games. Keep Leveling modest so footsteps and effects stay clear without big spikes. If your TV has a Game mode, confirm it does not disable needed audio tools.
Over-the-air news and local stations
Enable Leveling on the TV input for the tuner. Add minimal Dialogue boost. Verify each station retains settings, as OTA inputs often store profiles separately. If audio varies wildly between stations, adjust per-channel where possible.
Accessibility-First Setups for Clearer Dialogue
Consistent volume helps everyone, but small changes make a big difference for listeners who struggle with speech. The next tips extend what you know with a focus on clarity and comfort.
Profiles for hard-of-hearing viewers
Create a dedicated preset with Leveling on, Night Mode low, and Dialogue enhancement moderate. Save it to a quick button if your TV allows it. Keep master volume lower to prevent fatigue. Invite feedback from the listener and tune one step at a time.
Center channel and speech clarity tools
With an AVR, raise the center channel by 2–3 dB rather than cranking compression. On soundbars, enable Voice or Clear Voice one step at a time. Avoid settings that hiss or emphasize s sounds. If the bar supports dialogue isolation, test it at low strength first.
Subtitles and assistive features that pair well with leveling
Turn on closed captions during complex scenes. Try dialog-only EQ profiles if your soundbar provides them. Combine modest DRC with captions for late-night sessions to keep intelligibility high without high volume. If available, use hearing profiles tailored to specific frequencies.
When to Turn Leveling Off for Reference-Quality Viewing
There are times when purity matters more than convenience. You can disable leveling quickly and enjoy full dynamics. These cases mirror the earlier warnings about over-compression.
Critical movie watching and music concerts
Turn off Leveling and Night Mode for a big action film or a concert. Let wide dynamic range breathe. Keep dialogue tools minimal unless voices vanish. If your system supports reference level presets, use them only when noise limits are not a concern.
Calibrated rooms and object-based audio
If you run an Atmos setup with room correction, keep bitstream on and let your AVR work. Do not add extra compression unless neighbors complain. The system already manages peaks within design limits. Trust your calibration and avoid stacking extra processing.
Switching profiles quickly
Save Day and Night presets. Map them to remote buttons if supported. Switching modes beats diving into menus. It also prevents accidental stacking of multiple processors and keeps your chain clean.
Conclusion
Stable sound is not magic. It comes from a few smart choices and a clear signal path. You start by turning on leveling. You match formats so the right device can work. You use Night Mode and Dialogue tools only as much as you need.
If ads still shout, you apply source-side leveling or move processing to a soundbar or AVR. You test with the same clips and adjust in small steps. Soon, you stop riding the volume and start focusing on the story. Set it once, save a profile, and enjoy consistent, comfortable sound on anything you watch.
Frequently Asked Questions
Why do commercials still sound louder even with sound leveling on?
Ads compress sound and pack energy into frequencies our ears hear best. That design triggers higher perceived loudness, even when average levels meet limits. If leveling alone does not tame them, add light Dynamic Range Compression or ‘Reduce Loud Sounds.’ Also check your signal path. If your TV passes a Dolby bitstream over eARC, its leveling may not apply. In that case, enable leveling on your soundbar or AVR, or change the source output to PCM so the TV can process audio. Verify each app’s settings as some override system choices. Avoid stacking multiple aggressive processors; too much compression can cause pumping and make speech harder to follow.
Does TV sound leveling work with Dolby Atmos and surround sound?
It depends on where you process the audio and the format in use. Many TVs do not process bitstreamed Dolby Digital or Dolby Atmos; they pass it through to preserve quality. If your TV cannot level those streams, you have two options. First, move leveling to your soundbar or AVR, which often includes better algorithms for multichannel audio. Second, switch the source to PCM when you need leveling to apply at the TV. For late-night viewing, an AVR’s ‘Night,’ ‘Dynamic Range,’ or ‘Dialogue Lift’ features often outperform TV-based tools while maintaining surround cues.
Should I enable sound leveling on my TV, my streaming device, or my soundbar?
Pick a single lead device to avoid double-processing. If you use a soundbar or AVR, start there; its hardware usually delivers cleaner results and can handle multichannel audio. Leave TV and streamer processing off at first. If you use TV speakers only, enable the TV’s Auto Volume or Leveling. When commercials still spike or an app ignores TV settings, enable the streamer’s leveling (Roku Volume Leveling, Fire TV Volume Leveler, Apple TV Reduce Loud Sounds). If you change formats for specific content—PCM for leveling, bitstream for Atmos—save separate Day and Night profiles so you can switch fast without digging into menus.