Pioneer TV Not Turning On? A Complete Step-by-Step Troubleshooting Guide
Introduction
When a Pioneer TV refuses to power up, it stops the show and starts the guessing. You press the button. Nothing. Maybe a light blinks, or the logo appears then vanishes. The cause could be simple, like a loose plug, a tripped surge protector, or a confused remote. It could also be a software hang on a Fire TV or Android TV model. In rarer cases, hardware inside the set fails. The best way forward is to move from quick, safe checks to deeper steps in a clear order.
This guide gives you that order. You will start with clean wall power and cords. You will drain residual power and watch the standby light to guide your next steps. You will test the remote and the TV’s own buttons. You will isolate HDMI and USB devices to clear CEC and handshake lockups. You will try software recoveries on smart models. You will learn how to spot a backlight failure when you have sound but no picture. You will also see when to stop and call support. By following this path, you can fix the issue fast or confirm a repair plan.
The first step is safety. Quick checks help only if you stay safe while you do them.
Safety First: When to Troubleshoot and When to Stop
Your safety matters more than a screen lighting up. Work on a stable, dry, well lit surface. Unplug the TV before you move it or connect and disconnect cables. Never open the TV case unless you are trained. TVs can store high voltage even when unplugged. If you smell burning, see smoke, or hear arcing, stop immediately and unplug the set.
You can safely:
– Check wall outlets, power strips, and breakers.
– Unplug and replug cords and external devices.
– Perform power resets and software steps.
– Use a flashlight test on the screen.
Do not:
– Remove the back cover.
– Replace internal fuses or boards without training.
– Keep forcing power if the TV cycles off with repeated clicks.
If basic steps fail or the TV shows signs of electrical damage, contact Pioneer support or a qualified technician. With safety in mind, the next move is to identify your TV type so you can apply the right fixes.
Identify Your Pioneer TV Model Family (Fire TV, Android TV/Google TV, Elite/Kuro)
Different Pioneer models fail and recover in different ways. Identify what you have to choose the best path.
- Fire TV Edition: The interface loads Amazon’s Fire TV. The remote has a Home button with a house icon and streaming shortcuts. Boot issues can come from apps, cached data, or a stuck update.
- Android TV or Google TV: The interface shows Google TV or Android TV tiles. The remote often has a Google Assistant button. Recovery mode and cache wipes can help when software hangs.
- Elite or Kuro (older plasma or early LCD/LED): These sets may show specific standby blink codes. Power supplies and sustain or backlight boards fail more often with age. Software recovery options are limited or none.
Find the model number on the back label or in your purchase records. Search the exact model online to confirm its platform. Once you know the platform, start with the simplest checks: power and cabling.
Quick Power Checks: Outlets, Cords, and Surge Protectors
Rule out simple power issues before you go deeper. A TV cannot turn on without clean power, and accessories can block it.
- Test the outlet: Plug in a lamp or phone charger. If it does not work, reset the breaker or GFCI. Try a different wall outlet that you know works.
- Bypass power strips: Plug the TV directly into the wall. Surge protectors and UPS units fail or trip often.
- Inspect the cord: Make sure the power cord seats firmly at the TV and the wall. Look for cuts, kinks, or loose connectors. If your model uses a detachable IEC cord, try a different one.
- Check in line adapters: Some sets use a brick adapter. Ensure the LED (if present) is lit and the brick is not overly hot.
- Reduce load: Unplug all HDMI and USB devices for now.
Many no power calls end here. Loose cords and tripped strips are common. If you still see no signs of life, the next step is a deep power drain to reset control logic.
Perform a Proper Power Drain Reset
Residual charge inside the TV’s circuits can lock up control logic. A deep power drain clears it.
Do this:
1) Unplug the TV from wall power.
2) Hold the TV’s physical Power button on the set for 30 seconds. If your model lacks a clear power button on the bezel, press and hold any button marked Power or On/Off. If none are present, skip the hold and continue.
3) Release the button and wait 60 seconds with the TV still unplugged.
4) Plug the TV back directly into a known good wall outlet.
5) Try turning it on with the TV button first, then the remote.
This simple reset often revives a stuck standby controller or a smart TV module trapped mid boot. If the set remains unresponsive, read the standby light for clues.
Read the Standby Light: No LED, Solid, or Blinking
The standby LED tells you where to look next. Note the color and behavior.
No standby light at all: truly dead set checks
No light suggests no standby power. Recheck the outlet and cord. Try a different cable and wall socket. If the TV still shows no LED or startup sound, the power supply may have failed, or an internal fuse may have blown. Avoid opening the TV. Rule out external factors first, then consider professional service.
Solid standby light: stuck in standby or sleep
A solid light means the TV sees power but will not wake. Try:
– Press the TV’s Power button for 5 to 10 seconds.
– Replace the remote batteries. Aim closely and press Power once.
– Unplug all HDMI and USB devices and try again.
– Disable Eco or Power Saving once the set wakes.
If it still will not wake, perform the deep power drain again and move on to HDMI CEC isolation and software fixes.
Blinking LED patterns: what they usually indicate
Blinking patterns often signal protection mode or error codes. Count the blinks and note pauses. Common triggers include shorted backlight circuits, main board faults, or overcurrent events after power surges. If the TV blinks in a repeating pattern and clicks off, do not keep cycling power. Isolate all external devices, try a deep drain, and move to the outage or surge checklist. Persistent blink codes usually require service.
The standby light helps set direction. The next step is to rule out a bad remote or a blocked wake signal.
Remote vs Panel Button Tests and Common Wake Issues
Rule out a bad remote or a wake issue. You want to prove the TV can power on with its own buttons.
- Replace the remote batteries with fresh ones. Reinsert them in the correct orientation.
- Try the TV’s physical Power button. Many sets hide it under the logo, on a side, or on the back bottom edge.
- Remove line of sight blockers. IR remotes need a clear path.
- Press Power once and wait 10 to 15 seconds. Avoid rapid presses.
- If the set wakes only from the panel, re pair the remote as described later.
If the TV still sits with a solid standby light, your next step is to remove HDMI CEC and accessory conflicts that can block wake and boot.
HDMI-CEC and External Devices: Fixing Handshake Lockups
HDMI CEC lets devices turn each other on. It also causes TVs to hang at wake or boot if an input misbehaves. Clear this by isolating and then rebuilding your setup.
Do this:
1) Unplug all HDMI and USB devices from the TV.
2) Power drain the TV as above.
3) Turn the TV on with no devices attached.
4) If it boots, enter Settings and disable HDMI CEC (sometimes called Control or CEC).
5) Reconnect devices one by one. Power on the TV first, then the device.
If a device triggers the lockup, update its firmware and use high quality HDMI cables. You can leave CEC off or selectively enable it per port to avoid future freezes. When CEC is not the cause, software recovery on smart models is the next move.
Software-Level Fixes on Fire TV and Android TV Models
Smart Pioneer TVs can freeze during updates, app crashes, or storage issues. You can often recover without a service call.
Cold booting and safe mode basics
- Cold boot: Unplug the TV, press and hold the TV Power button for 30 seconds, plug back in, and turn on.
- Boot loop clues: If the logo appears then restarts, move to recovery steps.
- Safe mode on Android or Google TV: On many sets, hold the TV’s Power button while plugging in, or hold the remote’s Power button from a cold start until you see recovery options. If safe mode loads, third party apps may be causing the hang.
Clearing cache and removing problematic apps
- Fire TV: Settings > Applications > Manage Installed Applications > select apps > Clear Cache and Clear Data. Uninstall recently added apps that may crash at boot.
- Android or Google TV: Settings > Apps > See all apps > select apps > Clear Cache or Clear Storage. Remove apps you installed just before the issue.
Firmware or OS updates and recovery mode
- Fire TV: Settings > My Fire TV > About > Check for Updates. If the screen will not load, some models support a remote sequence such as holding Back and Menu or Left and Menu while powering up to enter recovery, then choose Wipe Cache first and Factory Reset only if needed.
- Android or Google TV: Settings > System > About > System Update. For hard recovery, use the physical buttons or a remote combo defined for your model to access Recovery and Wipe Cache first. If needed, do a Factory Reset.
Try cache wipes before factory resets to preserve settings and accounts. If software recovery does not help, a full reset may be required.
Factory Reset Options (With and Without Picture)
A factory reset clears deep software faults. Use it only after other fixes fail, and back up settings if possible.
Reset from Settings menu when the screen works
- Fire TV: Settings > My Fire TV > Reset to Factory Defaults. Enter PIN if asked.
- Android or Google TV: Settings > System > Reset > Factory Data Reset.
Stay plugged into stable power during the process. The TV will restart several times. After a reset, you will need to pair the remote again and walk through setup.
Hard reset button combos without a display
Some models support a hardware reset without a picture:
– Press and hold the TV’s Power button while plugging the cord back in, keep holding until a recovery screen appears, then choose Factory Reset.
– On some remotes, hold specific buttons at plug in to trigger recovery. Check your model’s manual for exact steps.
Re pairing the remote and initial setup notes
After a reset:
– Pair the remote: Hold Home for about 10 seconds on Fire TV, or follow on screen pairing prompts on Android or Google TV.
– Connect to Wi Fi on a 2.4 GHz network first for maximum compatibility.
– Install updates before reinstalling many apps.
– Keep HDMI CEC off until you confirm stable boots.
If the TV boots but shows a black screen while audio plays, the issue may be the backlight or panel rather than software.
No Picture but Sound? Backlight and T-CON Checks
If the TV plays sound but the screen is dark, the TV may be on with a backlight or panel issue.
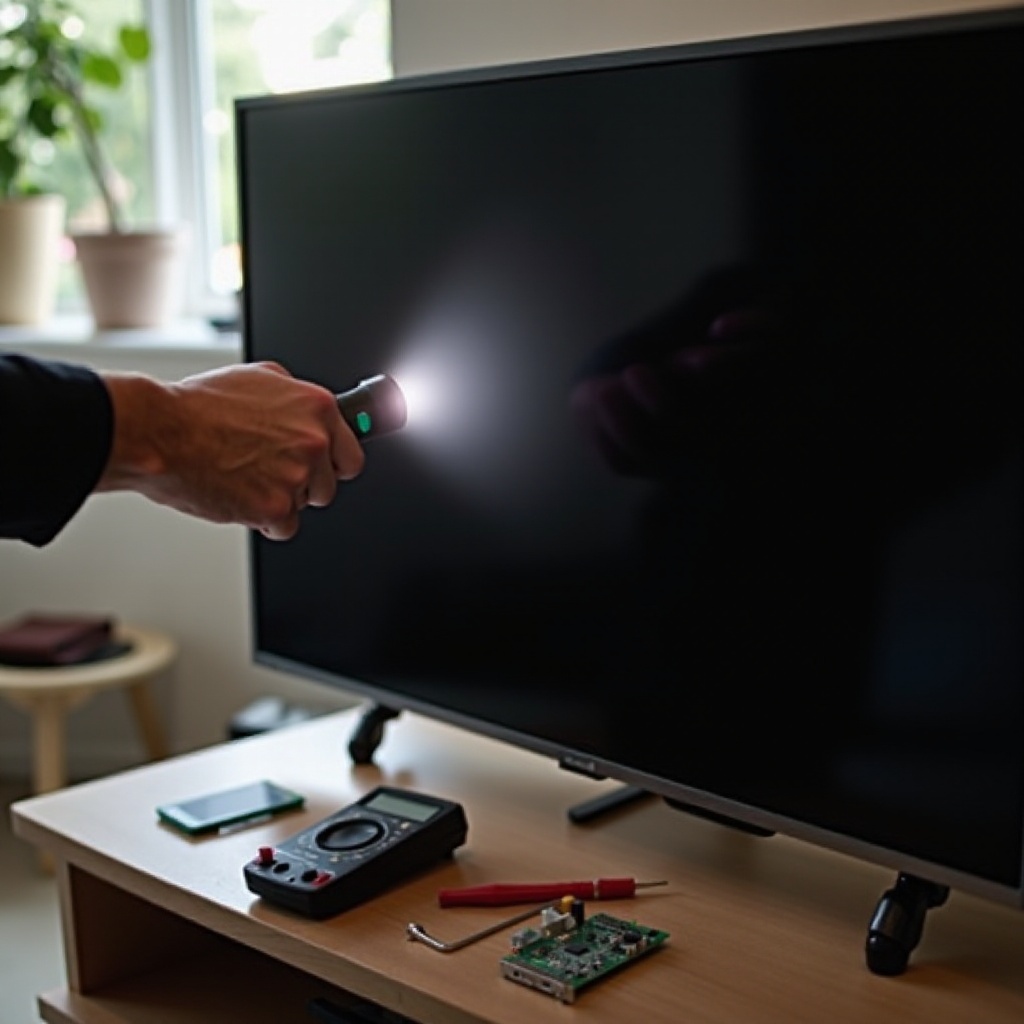
Flashlight test to spot a dim image
- Turn on the TV and play a known channel or app sound.
- In a dark room, shine a flashlight at an angle on the screen. If you see faint images, the backlight is off but the picture is there. The backlight system or its driver may have failed.
Backlight driver or inverter vs panel failure
- Full black with faint image found: Suspect the backlight driver or LED strips. Protection circuits may shut down LEDs if a strip shorts.
- Image fully absent and audio still plays: The T CON or panel may be at fault, but verify cables first.
T-CON ribbon reseat and symptoms
If you are experienced and comfortable, power off and unplug the TV, then gently press along the bezel to ensure ribbon cables are seated without opening the case. Do not open the TV. If the issue persists, a technician should reseat or replace the T CON board or backlight components. Avoid repeated power cycles; they can stress the power supply.
When no picture issues point to hardware, it helps to understand likely components and repair decisions.
Hardware Suspects: Power Supply, Main Board, Backlight, and Costs
When basic steps fail, hardware is likely. Understanding common points helps you decide the next move.
Power supply board: fuses, caps, and telltale signs
Symptoms: No standby light, no clicks, or shuts down under load. After surges, internal fuses or components may blow. You might hear a faint chirp on power attempts. Do not open the TV to inspect. A technician can confirm and replace the PSU.
Main board and boot faults
Symptoms: Logo shows then crashes, solid standby but no wake, HDMI CEC issues across all ports, random restarts. Software recovery sometimes helps, but persistent issues suggest a main board fault. Replacement restores stability in many cases.
Backlight arrays and typical repair ranges
Symptoms: Sound with dark screen; image visible with a flashlight. LED strips or driver boards fail with age. If the panel itself is bad, replacement may not be economical compared to a new TV. Request a diagnostic and written quote before deciding.
Hardware failures can follow power events. If your issue started after an outage or surge, follow a targeted recovery list next.
After a Power Outage or Surge: Special Recovery Checklist
Power events cause brownouts, surges, and CEC confusion. Clear these in a strict sequence.
Isolate HDMI or USB, reset surge protector or UPS
- Unplug all HDMI and USB accessories.
- Turn off or reset your surge protector or UPS. If it has a breaker, press to reset.
- Bypass the strip and plug the TV directly into the wall.
Breaker or GFCI checks and deep power drain
- Check your home breaker and any GFCI outlets on the same circuit.
- Perform a deep power drain.
- Power on the TV alone. If it starts, re enable devices one by one.
Signs of surge damage and next steps
- Smell of burnt plastic, visible scorching, or loud popping indicates damage.
- If the TV shows persistent blink codes after surges, stop troubleshooting and contact support.
- Document the event for warranty or home insurance claims. Take photos and save purchase receipts.
Once you recover from an outage, a few preventive steps can reduce the chance of the same problem returning.
Preventive Tips to Avoid Future No-Power Issues
You can reduce the odds of seeing the same issue again.
- Use a high quality surge protector or a line interactive UPS for your TV.
- Keep the TV’s vents clear. Dust builds heat and triggers protection.
- Avoid tight cabinets that trap hot air.
- Update firmware regularly on Fire TV or Android or Google TV models.
- Use certified HDMI cables and limit daisy chaining devices.
- Turn off HDMI CEC if it causes repeated wake issues.
- Power down game consoles before turning off the TV to avoid CEC deadlocks.
These habits protect your TV and save time later. If you still cannot power on after all steps, it is time to call for help with the right details in hand.
When to Call Support, Warranty Steps, and Data to Gather
If you have no standby light after all basic checks, see repeating blink codes, or face sound without picture after resets, it is time to call support. You will speed up the process by having details ready.
Gather:
– Model and serial number from the rear label or original box.
– Proof of purchase and purchase date.
– Exact symptoms: standby light status, blink counts, sounds, and what you already tried.
– Photos or a short video if safe to capture.
Contact Pioneer support or your retailer if you have extended coverage. Avoid more power cycles if the TV clicks off in protection mode. If a surge caused the failure, also contact your home insurer. Clear and concise information gives you faster, better service.
Conclusion
You can solve most Pioneer TV not turning on problems with a steady process. Start at the wall and work toward the TV. Drain power and watch the standby light. Test the panel button and the remote. Remove HDMI CEC conflicts. Apply software recoveries on Fire TV and Android or Google TV models. Use factory resets only when needed. If the screen stays dark but audio plays, check for backlight issues. When hardware fails or signs of surge damage appear, stop and call support.
By following this sequence, you avoid random guessing and prevent new issues. You save time and protect your TV. Whether you get it working now or confirm you need a repair, you make a smart, safe decision.
Frequently Asked Questions
Why does my Pioneer TV show a light but won’t turn on?
A solid standby light means the TV has power but will not wake. Common causes include a stuck control board, HDMI-CEC conflicts, or a software hang. Try a deep power drain, unplug all HDMI and USB devices, and press the TV’s Power button for 5–10 seconds. If it starts, disable HDMI-CEC in Settings and reconnect devices one by one. If it still will not wake, update the TV’s firmware or attempt a cache wipe or reset through recovery mode on Fire TV or Android or Google TV models.
How do I force-restart or hard reset a Pioneer Fire TV or Android TV if the screen is black?
First, perform a cold boot: unplug the TV, hold the TV Power button for 30 seconds, plug in, and turn on. If the screen stays black but you hear audio, do a flashlight test. To reach recovery, many models respond to holding the TV’s Power button while plugging in until a recovery screen appears. From there, choose Wipe Cache first. If that fails, Factory Reset. On Fire TV, some models also accept a remote sequence like holding Back and Menu at boot to enter recovery. Only factory reset after trying cache wipes and with stable power.
Is it worth repairing a Pioneer TV that won’t power on, or should I replace it?
It depends on the fault and the TV’s age and size. Simple issues like a failed power strip, cord, or software hang cost nothing. A power supply or main board repair can be reasonable on mid-to-large screens. Backlight strip replacements are often affordable, but a dead panel is rarely worth fixing. Get a diagnostic and quote first. If repair costs approach half the price of a comparable new TV, replacement makes more sense. Always check warranty and credit card protection before you decide.